
Copyright © 2008 - 2021 The University of Manchester and HITS gGmbHCredits
Download the correct distribution of RightField for your machine from http://www.rightfield.org.uk/download .
Once the download is complete, un-compress the distribution into an appropriate folder, as you will be running RightField from this folder. Java 8 or higher is a pre-requisite for using RightField, please download and install it if it is not currently present. You can download Java from http://www.java.com/en/.
To start using RightField, open the folder it was de-compressed into and double-click on the icon that is titled Rightfield (this may appear as RightField.bat on Windows). On Linux you should run the rightfield.sh script.
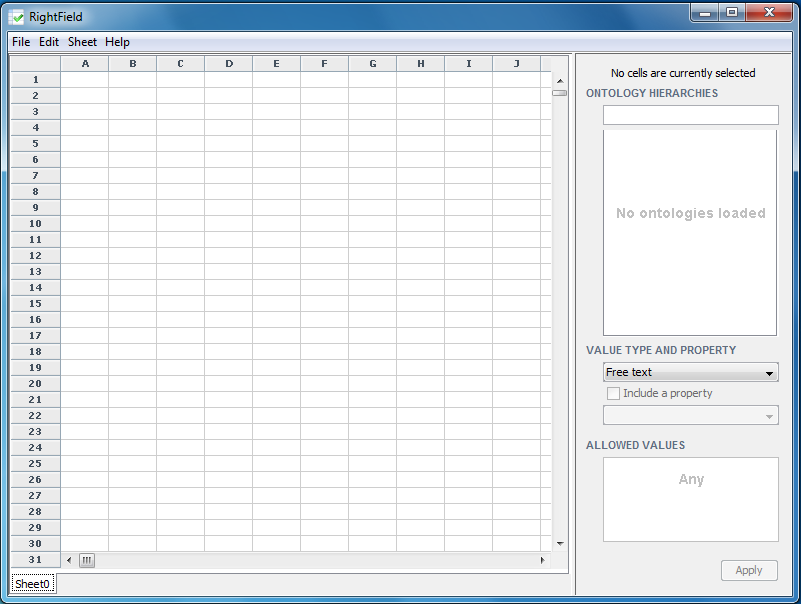
A dialogue box will then appear asking if you wish to Open an existing spreadsheet or Start with an empty spreadsheet. If an empty spreadsheet is selected, the following screen will appear which shows an empty spreadsheet in the left window pane and an empty ontology in the right window pane.
If an existing spreadsheet is opened and it has already been marked-up in RightField, a dialogue box will ask you if you wish to open the same ontologies as before. In this case, select ‘no’.
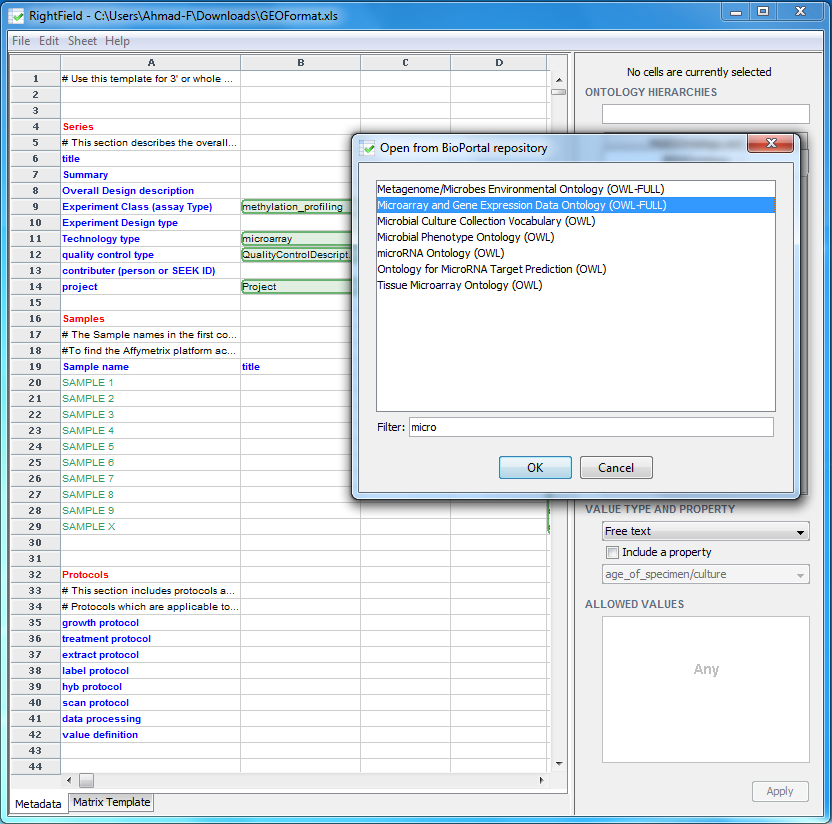
We can now start marking-up individual cells by importing ontologies from your local machine, or from the BioPortal, or from a URL. To open an ontology from the BioPortal, select ‘File’ -> ‘Open from BioPortal’. For this example, find the Microarray and Gene Expression Data (MGED) ontology from the drop-down list, either by typing in the first few characters in the ‘Filter’ field box, or by scrolling down the list, select the entry, and then click ‘OK’.
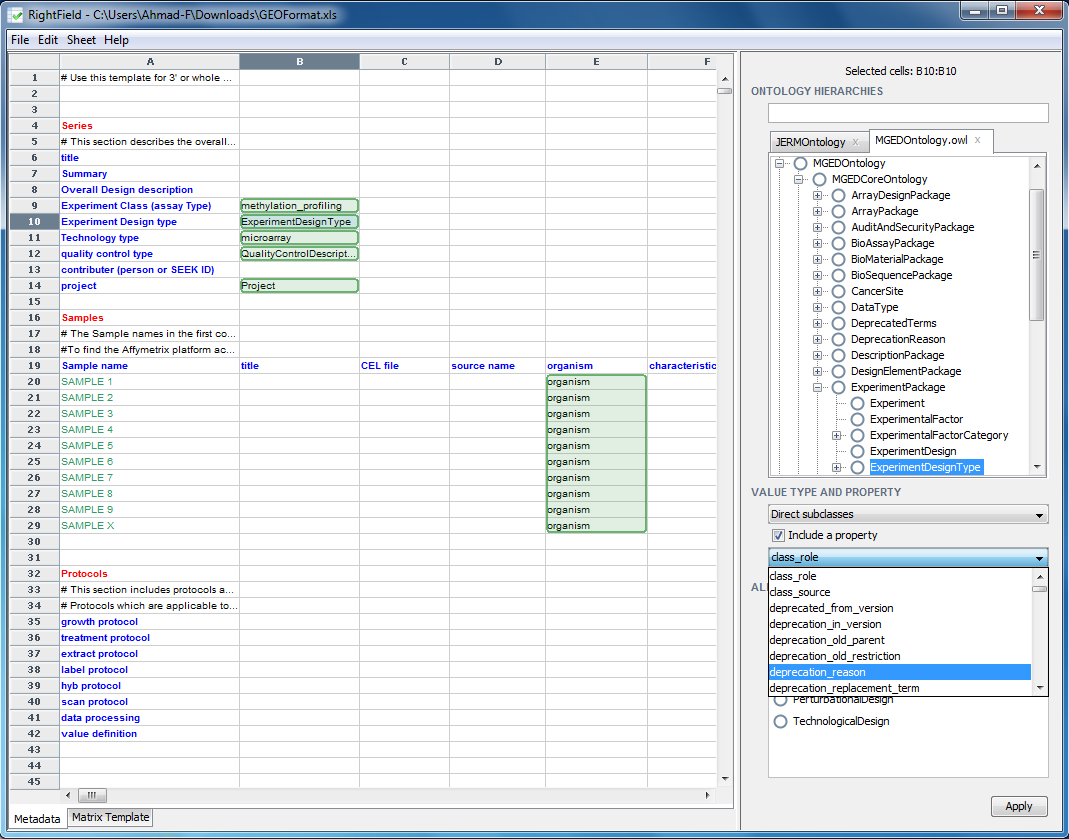
The chosen ontology will then appear in the right windows pane. In the search box at the top, labelled ‘Ontology Hierarchy’, search for ExperimentDesignType. Explore the subclasses by clicking on the plus box left of the label ‘ExperimentDesignType’ and expanding its tree.
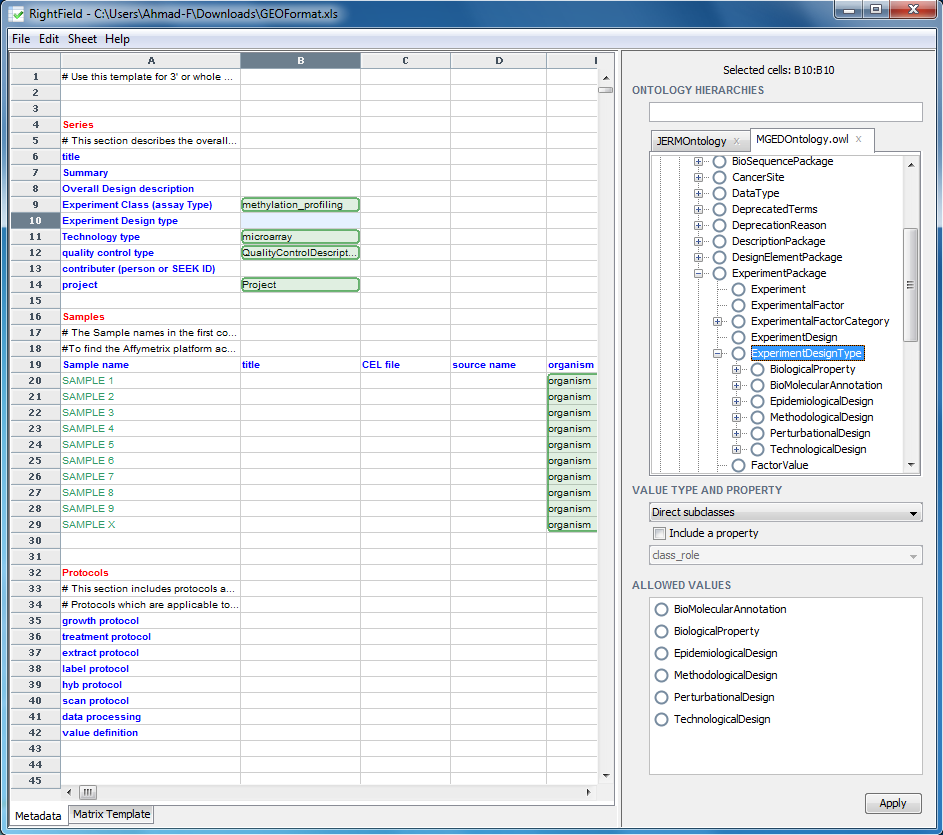
To Mark-up a cell, or a range of cells, select them in the spreadsheet view, then select the ontology term. Next select the ‘Type of allowed values’ under the Ontology Hierarchies window. Once you are happy with your selection, click the Apply button to apply the change made to the cells selected. For example, we will mark-up cell B10 with all the direct subclasses of ExperimentDesignType. Select cell B10, then select ‘ExperimentDesignType’ in the ontology and select ‘Direct subclasses’ form the drop down menu titled ‘Value Type and Property’, which lies just below the Ontology Hierarchy window pane. Clicking ‘Apply’ confirms the change.
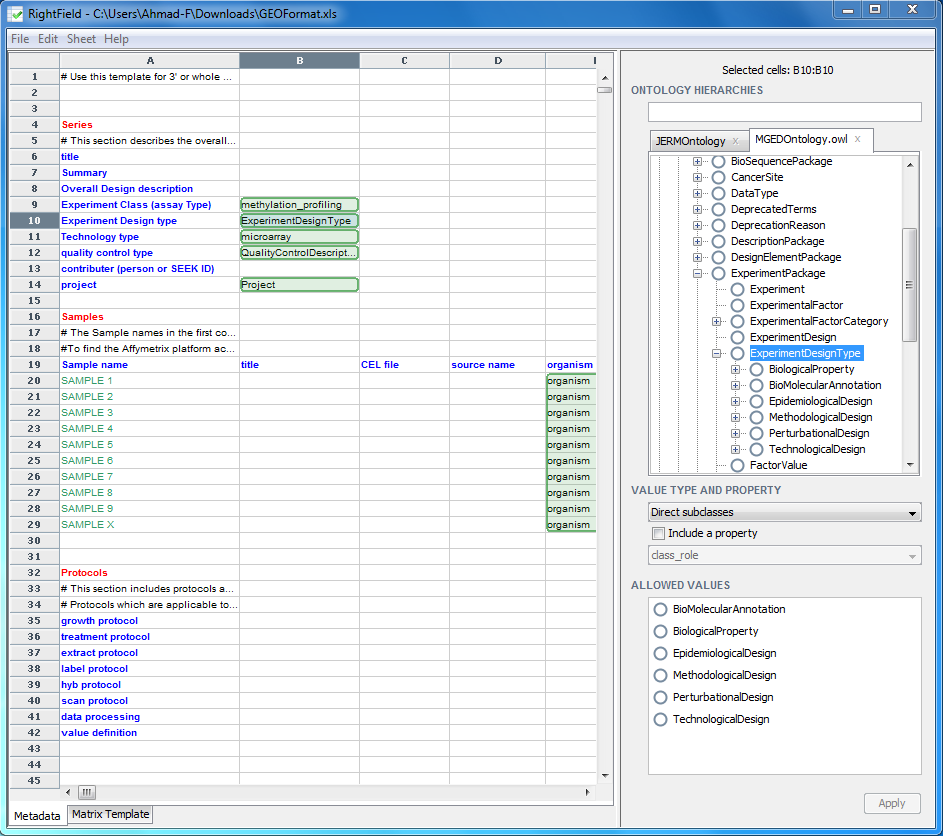
When a cell has been marked-up, the cell will change colour to green. Mark-up other cells, or ranges of cells and save the spreadsheet by selecting ‘File’ -> ‘Save Spreadsheet’. A property can also be assigned to a marked up cell by clicking on the ‘Include a property’ check box, which will result in the drop down menu below it being enabled, and then selecting a property form this drop down menu. This property is then applied to the predicate in the RDF associated with the spreadsheet.
When you open the spreadsheet normally, i.e. using Excel as opposed to RightField, any marked-up cells will be shown in yellow. Each yellow cell will have a drop-down list of allowed values from your chosen ontologies.

RightField encapsulates and stores information about ontology terms used inside the spreadsheets in hidden sheets. This ensures that no provenance information is lost regarding the ontology version used for annotation and it allows the storage of unique identifiers for ontology terms as well as the term labels. The information in hidden sheets is crucial for the extraction and storage of the spreadsheet data in other formats and for searching over the data. In future versions of RightField, this hidden information may be accessible from the native, marked-up spreadsheets.